android通信服务器实现注册功能_安卓app与后台通信登陆注册-程序员宅基地
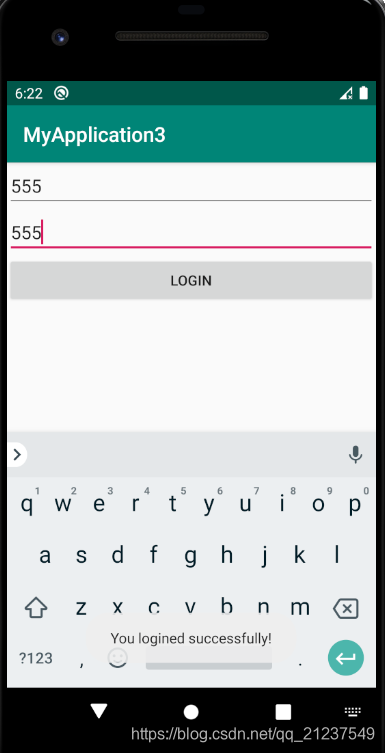
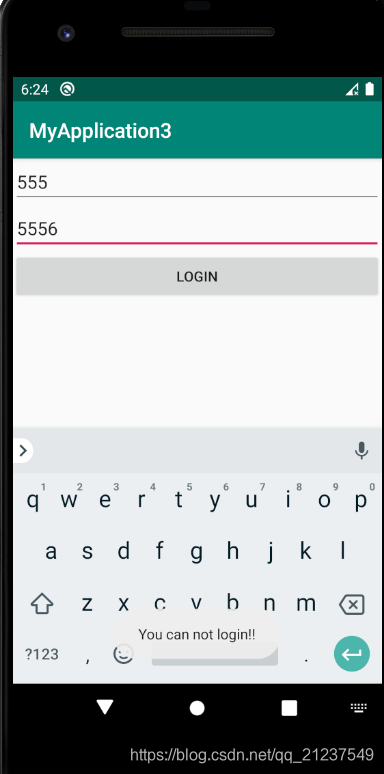
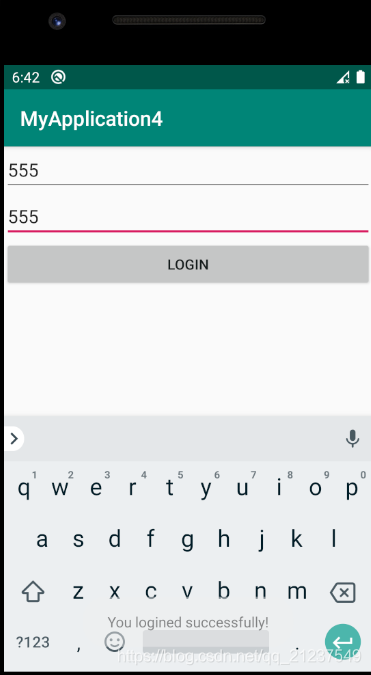
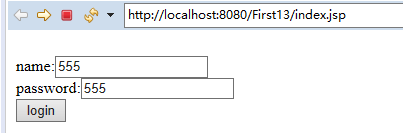
效果图:
数据库:

一些问题:
1.sdk28之后的版本(不可以http明文,所以要加网络安全设置network_security_config,详见后面的相应内容)
安卓import android.support.v7.app.AppCompatActivity报错?
试试导入
import androidx.appcompat.app.AppCompatActivity;
参考:https://blog.csdn.net/Baro_knight/article/details/96572357
2.sdk28之前的版本(可以http明文,所以默认)
无法导入import android.support.v7.app.AppCompatActivity
注意需要修改
用sdk28以下的话这两句需要删除,这样import android.support.v7.app.AppCompatActivity就能成功了
3.用sdk28以后发现http始终连不通
Android compileSdkVersion=28使用http请求报错not permitted by network security policy
问题: 由于 Android (版本27以上) 限制了明文流量的网络请求,非加密的流量请求都会被系统禁止掉。
如果当前应用的请求是 htttp 请求,而非 https ,这样就会导系统禁止当前应用进行该请求
推荐的做法是服务器和本地应用都改用 https ,测试时为了方便使用http,上线时应该都会用https才比较安全。
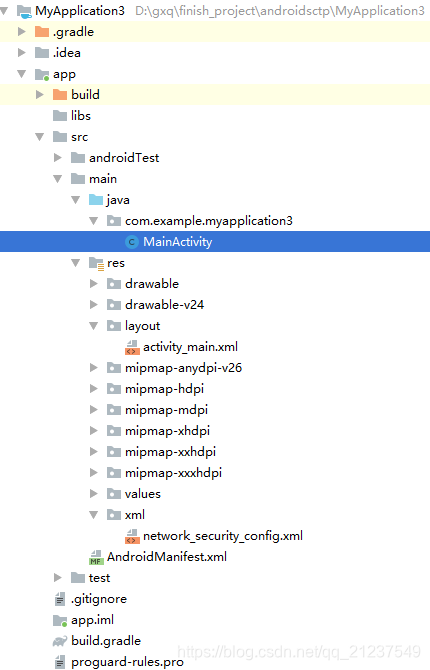
解决办法:在 res 下新建一个 xml 目录,然后创建一个名为:network_security_config.xml 文件 ,该文件内容如下:
<?xml version="1.0" encoding="utf-8"?>
<network-security-config>
<base-config cleartextTrafficPermitted="true" />
</network-security-config>
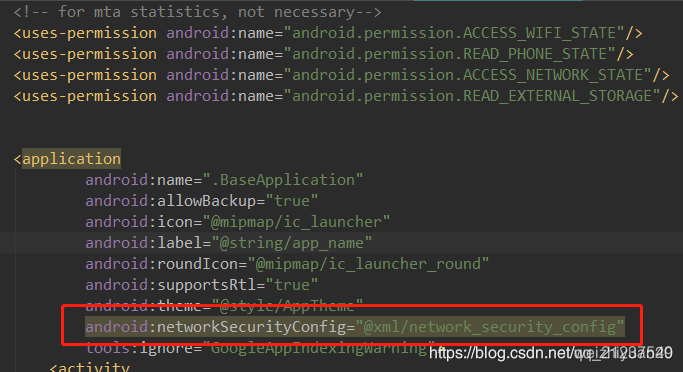
在 AndroidManifest.xml application增加配置android:networkSecurityConfig="@xml/network_security_config"
参考博客:https://blog.csdn.net/weizhiyuan20/article/details/88869613
下面演示了两个版本的完整代码与代码区别
方案一:用compileSdkVersion 29的方案一
代码文件结构:
MainActivity.java
package com.example.myapplication3;

import android.os.Looper;
import androidx.appcompat.app.AppCompatActivity;
import android.os.Bundle;
import android.util.Log;
import android.view.View;
import android.widget.Button;
import android.widget.EditText;
import android.widget.Toast;

import java.io.BufferedReader;
import java.io.IOException;
import java.io.InputStream;
import java.io.InputStreamReader;
import java.net.HttpURLConnection;
import java.net.MalformedURLException;
import java.net.URL;

public class MainActivity extends AppCompatActivity {


    @Override
    protected void onCreate(Bundle savedInstanceState) {

        super.onCreate(savedInstanceState);
        setContentView(R.layout.activity_main);
        final EditText logname = (EditText) findViewById(R.id.logname);
        final EditText password = (EditText) findViewById(R.id.password);
        Button login = (Button) findViewById(R.id.login);
        login.setOnClickListener(new View.OnClickListener() {

            @Override
            public void onClick(View view) {

                final String name = logname.getText().toString().trim();
                final String psw = password.getText().toString().trim();
                new Thread(new Runnable() {

                    @Override
                    public void run() {

                        String path="http://192.168.191.1:8080/First13/mustLogin?logname="+name+"&password="+psw;
                        try {

                            try{

                                URL url = new URL(path); //新建url并实例化
                                HttpURLConnection connection = (HttpURLConnection) url.openConnection();
                                connection.setRequestMethod("GET");//获取服务器数据
                                connection.setReadTimeout(8000);//设置读取超时的毫秒数
                                connection.setConnectTimeout(8000);//设置连接超时的毫秒数
                                InputStream in = connection.getInputStream();
                                BufferedReader reader = new BufferedReader(new InputStreamReader(in));
                                String result = reader.readLine();//读取服务器进行逻辑处理后页面显示的数据
                                Log.d("MainActivity","run: "+result);
                                if (result.equals("login successfully!")){

                                    Log.d("MainActivity","run2: "+result);
                                    Looper.prepare();
                                    Log.d("MainActivity","run3: "+result);
                                    Toast.makeText(MainActivity.this,"You logined successfully!",Toast.LENGTH_SHORT).show();
                                    Log.d("MainActivity","run4: "+result);
                                    Looper.loop();
                                }else if(result.equals("can not login!")){

                                    Looper.prepare();
                                    Toast.makeText(MainActivity.this,"You can not login!!",Toast.LENGTH_SHORT).show();
                                    Looper.loop();
                                }
                            }catch (MalformedURLException e){
    }
                        } catch (IOException e) {

                            e.printStackTrace();
                        }
                    }
                }).start();
            }
        });
    }
}
activity_main.xml
<?xml version="1.0" encoding="utf-8"?>
<LinearLayout xmlns:android="http://schemas.android.com/apk/res/android"
    android:orientation="vertical" android:layout_width="match_parent"
    android:layout_height="match_parent">

    <EditText
        android:id="@+id/logname"
        android:layout_width="match_parent"
        android:layout_height="wrap_content"
        android:hint="Your name"
        android:ems="10" />

    <EditText
        android:id="@+id/password"
        android:layout_width="match_parent"
        android:layout_height="wrap_content"
        android:ems="10"
        android:hint="Your password" />

    <Button
        android:id="@+id/login"
        android:layout_width="match_parent"
        android:layout_height="wrap_content"
        android:text="Login" />
</LinearLayout>
AndroidManifest.xml
<?xml version="1.0" encoding="utf-8"?>
<manifest xmlns:android="http://schemas.android.com/apk/res/android"
    package="com.example.myapplication3">
    <uses-permission android:name="android.permission.INTERNET"/>
    <application
        android:networkSecurityConfig="@xml/network_security_config"
        android:allowBackup="true"
        android:icon="@mipmap/ic_launcher"
        android:label="@string/app_name"
        android:roundIcon="@mipmap/ic_launcher_round"
        android:supportsRtl="true"
        android:theme="@style/AppTheme">
        <activity android:name=".MainActivity">
            <intent-filter>
                <action android:name="android.intent.action.MAIN" />

                <category android:name="android.intent.category.LAUNCHER" />
            </intent-filter>
        </activity>
    </application>

</manifest>
build.gradle就用默认的就可以
apply plugin: 'com.android.application'

android {

    compileSdkVersion 29
    buildToolsVersion "29.0.2"
    defaultConfig {

        applicationId "com.example.myapplication3"
        minSdkVersion 14
        targetSdkVersion 29
        versionCode 1
        versionName "1.0"
        testInstrumentationRunner "androidx.test.runner.AndroidJUnitRunner"
    }
    buildTypes {

        release {

            minifyEnabled false
            proguardFiles getDefaultProguardFile('proguard-android-optimize.txt'), 'proguard-rules.pro'
        }
    }
}

dependencies {

    implementation fileTree(dir: 'libs', include: ['*.jar'])
    implementation 'androidx.appcompat:appcompat:1.1.0'
    implementation 'androidx.constraintlayout:constraintlayout:1.1.3'
    testImplementation 'junit:junit:4.12'
    androidTestImplementation 'androidx.test.ext:junit:1.1.1'
    androidTestImplementation 'androidx.test.espresso:espresso-core:3.2.0'
}
注意现在要用http明文传输,在res中创建一个xml文件夹,然后在里面创建一个network_security_config.xml,里面的内容如下:
<?xml version="1.0" encoding="utf-8"?>
<network-security-config>
<base-config cleartextTrafficPermitted="true" />
</network-security-config>
这个xml的引用在AndroidManifest.xml中,在application中加入这个引用

必须得设置,不然无法连接与服务器传数据
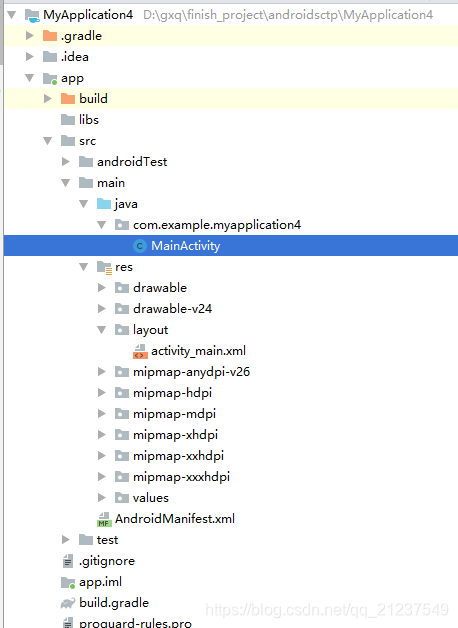
方案二:用compileSdkVersion 26
效果同
文件目录:
MainActivity.java
package com.example.myapplication4;

import android.os.Looper;
import android.support.v7.app.AppCompatActivity;
import android.os.Bundle;
import android.util.Log;
import android.view.View;
import android.widget.Button;
import android.widget.EditText;
import android.widget.Toast;

import java.io.BufferedReader;
import java.io.IOException;
import java.io.InputStream;
import java.io.InputStreamReader;
import java.net.HttpURLConnection;
import java.net.MalformedURLException;
import java.net.URL;

public class MainActivity extends AppCompatActivity {


    @Override
    protected void onCreate(Bundle savedInstanceState) {

        super.onCreate(savedInstanceState);
        setContentView(R.layout.activity_main);
        final EditText logname = (EditText) findViewById(R.id.logname);
        final EditText password = (EditText) findViewById(R.id.password);
        Button login = (Button) findViewById(R.id.login);
        login.setOnClickListener(new View.OnClickListener() {

            @Override
            public void onClick(View view) {

                final String name = logname.getText().toString().trim();
                final String psw = password.getText().toString().trim();
                new Thread(new Runnable() {

                    @Override
                    public void run() {

                        String path="http://192.168.191.1:8080/First13/mustLogin?logname="+name+"&password="+psw;
                        try {

                            try{

                                URL url = new URL(path); //新建url并实例化
                                HttpURLConnection connection = (HttpURLConnection) url.openConnection();
                                connection.setRequestMethod("GET");//获取服务器数据
                                connection.setReadTimeout(8000);//设置读取超时的毫秒数
                                connection.setConnectTimeout(8000);//设置连接超时的毫秒数
                                InputStream in = connection.getInputStream();
                                BufferedReader reader = new BufferedReader(new InputStreamReader(in));
                                String result = reader.readLine();//读取服务器进行逻辑处理后页面显示的数据
                                Log.d("MainActivity","run: "+result);
                                if (result.equals("login successfully!")){

                                    Log.d("MainActivity","run2: "+result);
                                    Looper.prepare();
                                    Log.d("MainActivity","run3: "+result);
                                    Toast.makeText(MainActivity.this,"You logined successfully!",Toast.LENGTH_SHORT).show();
                                    Log.d("MainActivity","run4: "+result);
                                    Looper.loop();
                                }else if(result.equals("can not login!")){

                                    Looper.prepare();
                                    Toast.makeText(MainActivity.this,"You can not login!!",Toast.LENGTH_SHORT).show();
                                    Looper.loop();
                                }
                            }catch (MalformedURLException e){
    }
                        } catch (IOException e) {

                            e.printStackTrace();
                        }
                    }
                }).start();
            }
        });
    }
}
activity_main.xml
<?xml version="1.0" encoding="utf-8"?>
<LinearLayout xmlns:android="http://schemas.android.com/apk/res/android"
    android:orientation="vertical" android:layout_width="match_parent"
    android:layout_height="match_parent">

    <EditText
        android:id="@+id/logname"
        android:layout_width="match_parent"
        android:layout_height="wrap_content"
        android:hint="Your name"
        android:ems="10" />

    <EditText
        android:id="@+id/password"
        android:layout_width="match_parent"
        android:layout_height="wrap_content"
        android:ems="10"
        android:hint="Your password" />

    <Button
        android:id="@+id/login"
        android:layout_width="match_parent"
        android:layout_height="wrap_content"
        android:text="Login" />
</LinearLayout>
AndroidManifest.xml:
<?xml version="1.0" encoding="utf-8"?>
<manifest xmlns:android="http://schemas.android.com/apk/res/android"
    package="com.example.myapplication4">

    <application
        android:allowBackup="true"
        android:icon="@mipmap/ic_launcher"
        android:label="@string/app_name"
        android:roundIcon="@mipmap/ic_launcher_round"
        android:supportsRtl="true"
        android:theme="@style/AppTheme">
        <activity android:name=".MainActivity">
            <intent-filter>
                <action android:name="android.intent.action.MAIN" />

                <category android:name="android.intent.category.LAUNCHER" />
            </intent-filter>
        </activity>
    </application>
    <uses-permission android:name="android.permission.INTERNET"/>
</manifest>
build.gradle
apply plugin: 'com.android.application'

android {

    compileSdkVersion 26
    defaultConfig {

        applicationId "com.example.gahui.httptest"
        minSdkVersion 15
        targetSdkVersion 26
        versionCode 1
        versionName "1.0"
        testInstrumentationRunner "android.support.test.runner.AndroidJUnitRunner"
    }
    buildTypes {

        release {

            minifyEnabled false
            proguardFiles getDefaultProguardFile('proguard-android.txt'), 'proguard-rules.pro'
        }
    }
}

dependencies {

    implementation fileTree(dir: 'libs', include: ['*.jar'])
    implementation 'com.android.support:appcompat-v7:26.0.0-beta1'
    implementation 'com.android.support.constraint:constraint-layout:1.0.2'
    testImplementation 'junit:junit:4.12'
    androidTestImplementation 'com.android.support.test:runner:1.0.1'
    androidTestImplementation 'com.android.support.test.espresso:espresso-core:3.0.1'
}
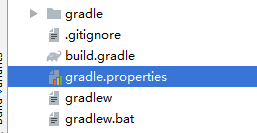
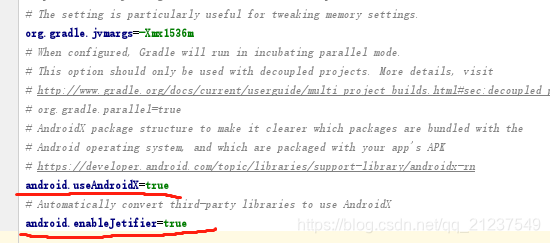
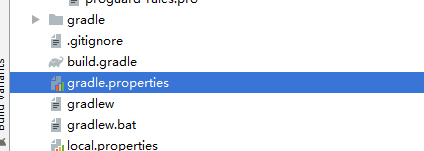
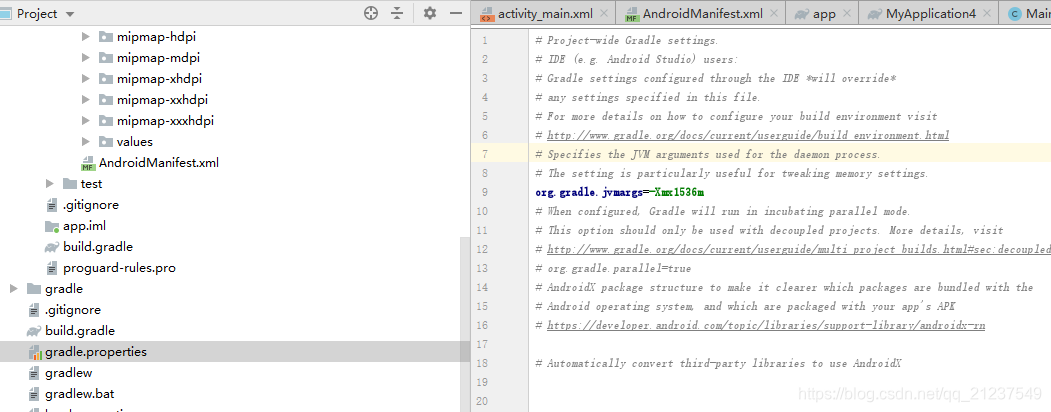
注意这里最外面的gradle.properties中的有些语句需要删除
参考:
https://blog.csdn.net/qq_36005498/article/details/104099785?depth_1-utm_source=distribute.pc_relevant.none-task&utm_source=distribute.pc_relevant.none-task
不然会
错误: 程序包android.support.v7.app不存在解决
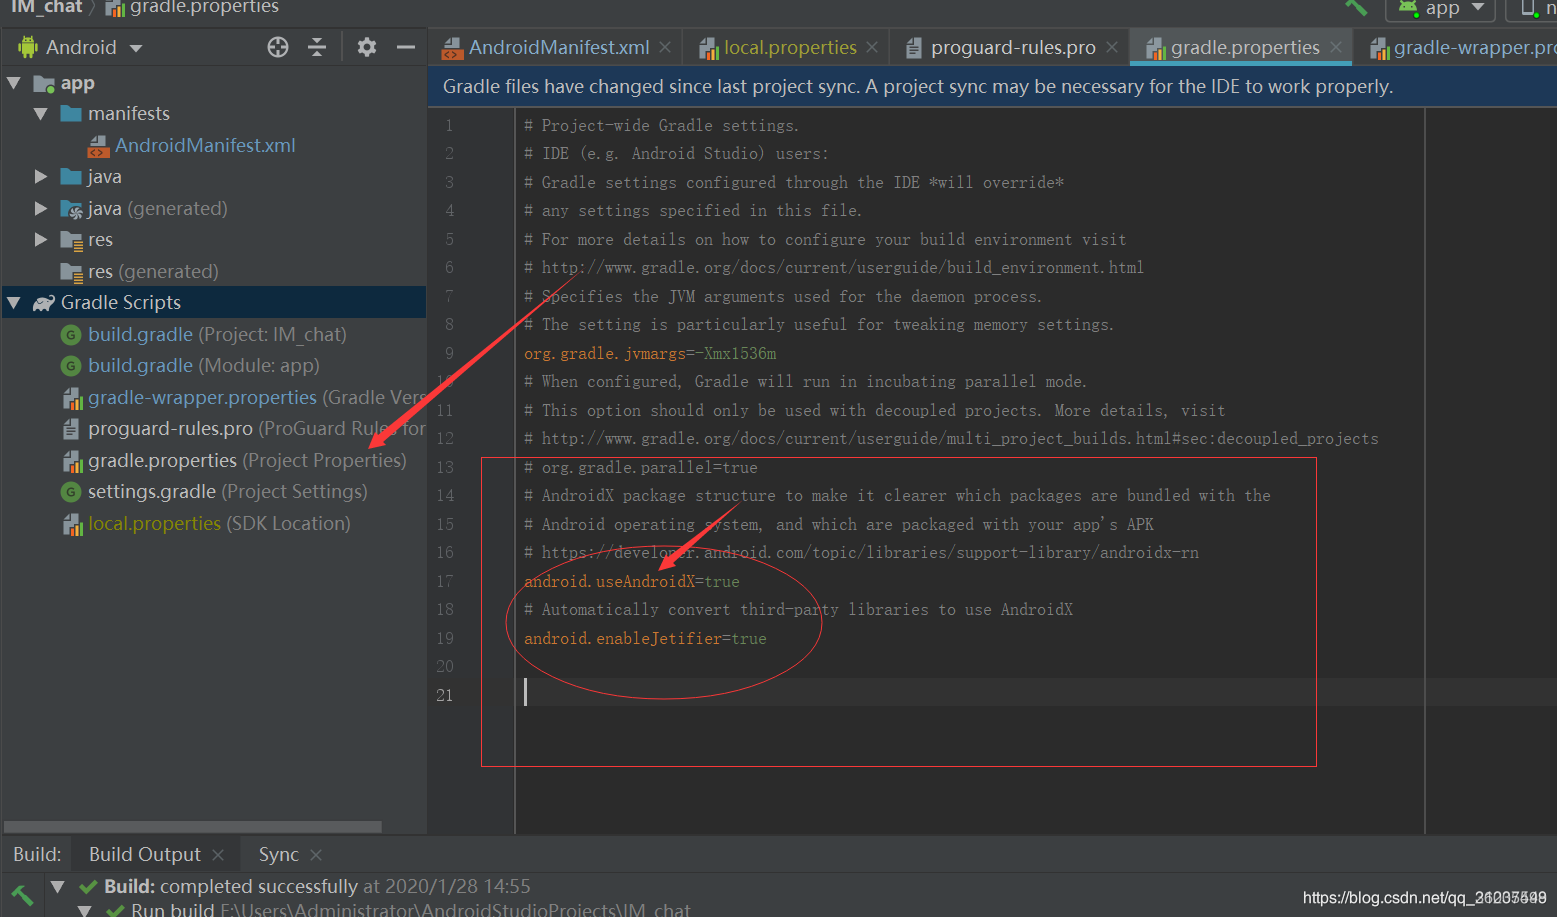
原因是新版的Android Studio在创建一个新的项目的时候,会比之前的项目中多配置这2个选项,大概意思是用新的AndroidX这个东西,这就导致老版本的程序包被忽略掉了,所以在使用代码中的import语句会出现如题错误。
删除即可正常运行
HttpResponse response=client.execute(post);空指针问题
1、在AndroidManifest.xml 里面加上访问网络的权限 ,如果没有加,则会抛出警告。
2、Android 4.0以上不能在主线程中对网络数据的请求,需要重新起一个线程。

参考:http://blog.sina.com.cn/s/blog_859977de0102vd40.html
服务器方面
服务器文件目录:
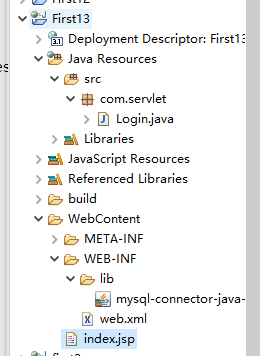
index.jsp
<%@ page language="java" contentType="text/html; charset=ISO-8859-1"
    pageEncoding="ISO-8859-1"%>
<!DOCTYPE html PUBLIC "-//W3C//DTD HTML 4.01 Transitional//EN" "http://www.w3.org/TR/html4/loose.dtd">
<html>
<head>
<meta http-equiv="Content-Type" content="text/html; charset=ISO-8859-1">
<title>welcome</title>
</head>
<body>
<form action="mustLogin" method="post">
<br>
	name:<input type="text" name="logname">
<br>password:<input type="text" name="password">
<br><input type="submit" value="login">
</form>
</body>
</html>
Login.java
package com.servlet;

import java.io.IOException;
import java.io.PrintWriter;
import java.sql.Connection;
import java.sql.DriverManager;
import java.sql.ResultSet;
import java.sql.SQLException;
import java.sql.Statement;

import javax.servlet.ServletConfig;
import javax.servlet.ServletException;
import javax.servlet.annotation.WebServlet;
import javax.servlet.http.HttpServlet;
import javax.servlet.http.HttpServletRequest;
import javax.servlet.http.HttpServletResponse;

/**
 * Servlet implementation class LoginTest
 */
@WebServlet("/LoginTest")
public class Login extends HttpServlet {

	private static final long serialVersionUID = 1L;

    /**
     * @see HttpServlet#HttpServlet()
     */
    public Login() {

        super();
        // TODO Auto-generated constructor stub
    }
    public void init(ServletConfig config) throws ServletException {

		// TODO Auto-generated method stub
		super.init(config);
		try {

			Class.forName("com.mysql.cj.jdbc.Driver");
		} catch (Exception e) {

			// TODO Auto-generated catch block
			e.printStackTrace();
		}
	}
	/**
	 * @see HttpServlet#doGet(HttpServletRequest request, HttpServletResponse response)
	 */
	protected void doGet(HttpServletRequest request, HttpServletResponse response) throws ServletException, IOException {

		// TODO Auto-generated method stub
		response.setContentType("text/html;charset=utf-8");
		PrintWriter out = response.getWriter();
		Connection con;
		Statement sql;
		String logname = request.getParameter("logname").trim();
		String password = request.getParameter("password").trim();
		String uri = "jdbc:mysql://localhost/MakeFriend?useSSL=false&serverTimezone=UTC";
		try {

			con = DriverManager.getConnection(uri,"root","gunxueqiu");
			String condition = "select * from member where logname = '"+logname+"' and password = '"+password+"'";
			sql = con.prepareStatement(condition);
			ResultSet rSet = sql.executeQuery(condition);
			if(rSet.next()) {

				out.println("login successfully!");
			}
			else {

				out.println("can not login!");
			}
			con.close();
		} catch (SQLException e) {

			// TODO Auto-generated catch block
			e.printStackTrace();
		}
	}

	/**
	 * @see HttpServlet#doPost(HttpServletRequest request, HttpServletResponse response)
	 */
	protected void doPost(HttpServletRequest request, HttpServletResponse response) throws ServletException, IOException {

		// TODO Auto-generated method stub
		doGet(request, response);
	}

}
web.xml
<?xml version="1.0" encoding="UTF-8"?>
<web-app xmlns:xsi="http://www.w3.org/2001/XMLSchema-instance" xmlns="http://xmlns.jcp.org/xml/ns/javaee" xsi:schemaLocation="http://xmlns.jcp.org/xml/ns/javaee http://xmlns.jcp.org/xml/ns/javaee/web-app_3_1.xsd" id="WebApp_ID" version="3.1">
  <display-name>First13</display-name>
  <welcome-file-list>
    <welcome-file>index.html</welcome-file>
    <welcome-file>index.htm</welcome-file>
    <welcome-file>index.jsp</welcome-file>
    <welcome-file>default.html</welcome-file>
    <welcome-file>default.htm</welcome-file>
    <welcome-file>default.jsp</welcome-file>
  </welcome-file-list>
  <servlet>
    <servlet-name>Login</servlet-name>
    <servlet-class>com.servlet.Login</servlet-class>
  </servlet>
  <servlet-mapping>
    <servlet-name>Login</servlet-name>
    <url-pattern>/mustLogin</url-pattern>
  </servlet-mapping>
  <servlet>
    <servlet-name>Test</servlet-name>
    <servlet-class>com.servlet.Test</servlet-class>
  </servlet>
  <servlet-mapping>
    <servlet-name>Test</servlet-name>
    <url-pattern>/mustTest</url-pattern>
  </servlet-mapping>
</web-app>
别忘了与数据库相应连上对应jdbc
服务器可以直接用index.jsp作为网页测试

成功!!!
注意:如果想用192.168.191.1访问,即本地局域网,则要先开启无线wifi,不然始终无法访问。
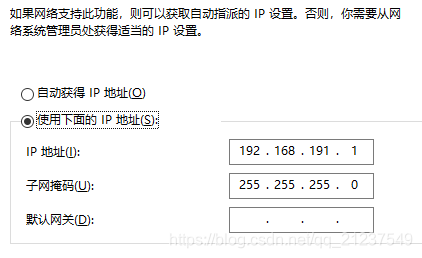

开启后即能访问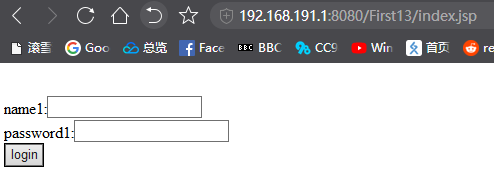
哪怕关闭之后也能,除非关机,那么再次开机需要再次开启局域网wifi。
智能推荐
攻防世界_难度8_happy_puzzle_攻防世界困难模式攻略图文-程序员宅基地
文章浏览阅读645次。这个肯定是末尾的IDAT了,因为IDAT必须要满了才会开始一下个IDAT,这个明显就是末尾的IDAT了。,对应下面的create_head()代码。,对应下面的create_tail()代码。不要考虑爆破,我已经试了一下,太多情况了。题目来源:UNCTF。_攻防世界困难模式攻略图文
达梦数据库的导出(备份)、导入_达梦数据库导入导出-程序员宅基地
文章浏览阅读2.9k次,点赞3次,收藏10次。偶尔会用到,记录、分享。1. 数据库导出1.1 切换到dmdba用户su - dmdba1.2 进入达梦数据库安装路径的bin目录,执行导库操作 导出语句:./dexp cwy_init/[email protected]:5236 file=cwy_init.dmp log=cwy_init_exp.log 注释: cwy_init/init_123..._达梦数据库导入导出
js引入kindeditor富文本编辑器的使用_kindeditor.js-程序员宅基地
文章浏览阅读1.9k次。1. 在官网上下载KindEditor文件,可以删掉不需要要到的jsp,asp,asp.net和php文件夹。接着把文件夹放到项目文件目录下。2. 修改html文件,在页面引入js文件:<script type="text/javascript" src="./kindeditor/kindeditor-all.js"></script><script type="text/javascript" src="./kindeditor/lang/zh-CN.js"_kindeditor.js
STM32学习过程记录11——基于STM32G431CBU6硬件SPI+DMA的高效WS2812B控制方法-程序员宅基地
文章浏览阅读2.3k次,点赞6次,收藏14次。SPI的详情简介不必赘述。假设我们通过SPI发送0xAA,我们的数据线就会变为10101010,通过修改不同的内容,即可修改SPI中0和1的持续时间。比如0xF0即为前半周期为高电平,后半周期为低电平的状态。在SPI的通信模式中,CPHA配置会影响该实验,下图展示了不同采样位置的SPI时序图[1]。CPOL = 0,CPHA = 1:CLK空闲状态 = 低电平,数据在下降沿采样,并在上升沿移出CPOL = 0,CPHA = 0:CLK空闲状态 = 低电平,数据在上升沿采样,并在下降沿移出。_stm32g431cbu6
计算机网络-数据链路层_接收方收到链路层数据后,使用crc检验后,余数为0,说明链路层的传输时可靠传输-程序员宅基地
文章浏览阅读1.2k次,点赞2次,收藏8次。数据链路层习题自测问题1.数据链路(即逻辑链路)与链路(即物理链路)有何区别?“电路接通了”与”数据链路接通了”的区别何在?2.数据链路层中的链路控制包括哪些功能?试讨论数据链路层做成可靠的链路层有哪些优点和缺点。3.网络适配器的作用是什么?网络适配器工作在哪一层?4.数据链路层的三个基本问题(帧定界、透明传输和差错检测)为什么都必须加以解决?5.如果在数据链路层不进行帧定界,会发生什么问题?6.PPP协议的主要特点是什么?为什么PPP不使用帧的编号?PPP适用于什么情况?为什么PPP协议不_接收方收到链路层数据后,使用crc检验后,余数为0,说明链路层的传输时可靠传输
软件测试工程师移民加拿大_无证移民,未受过软件工程师的教育(第1部分)-程序员宅基地
文章浏览阅读587次。软件测试工程师移民加拿大 无证移民,未受过软件工程师的教育(第1部分) (Undocumented Immigrant With No Education to Software Engineer(Part 1))Before I start, I want you to please bear with me on the way I write, I have very little gen...
随便推点
Thinkpad X250 secure boot failed 启动失败问题解决_安装完系统提示secureboot failure-程序员宅基地
文章浏览阅读304次。Thinkpad X250笔记本电脑,装的是FreeBSD,进入BIOS修改虚拟化配置(其后可能是误设置了安全开机),保存退出后系统无法启动,显示:secure boot failed ,把自己惊出一身冷汗,因为这台笔记本刚好还没开始做备份.....根据错误提示,到bios里面去找相关配置,在Security里面找到了Secure Boot选项,发现果然被设置为Enabled,将其修改为Disabled ,再开机,终于正常启动了。_安装完系统提示secureboot failure
C++如何做字符串分割(5种方法)_c++ 字符串分割-程序员宅基地
文章浏览阅读10w+次,点赞93次,收藏352次。1、用strtok函数进行字符串分割原型: char *strtok(char *str, const char *delim);功能:分解字符串为一组字符串。参数说明:str为要分解的字符串,delim为分隔符字符串。返回值:从str开头开始的一个个被分割的串。当没有被分割的串时则返回NULL。其它:strtok函数线程不安全,可以使用strtok_r替代。示例://借助strtok实现split#include <string.h>#include <stdio.h&_c++ 字符串分割
2013第四届蓝桥杯 C/C++本科A组 真题答案解析_2013年第四届c a组蓝桥杯省赛真题解答-程序员宅基地
文章浏览阅读2.3k次。1 .高斯日记 大数学家高斯有个好习惯:无论如何都要记日记。他的日记有个与众不同的地方,他从不注明年月日,而是用一个整数代替,比如:4210后来人们知道,那个整数就是日期,它表示那一天是高斯出生后的第几天。这或许也是个好习惯,它时时刻刻提醒着主人:日子又过去一天,还有多少时光可以用于浪费呢?高斯出生于:1777年4月30日。在高斯发现的一个重要定理的日记_2013年第四届c a组蓝桥杯省赛真题解答
基于供需算法优化的核极限学习机(KELM)分类算法-程序员宅基地
文章浏览阅读851次,点赞17次,收藏22次。摘要:本文利用供需算法对核极限学习机(KELM)进行优化,并用于分类。
metasploitable2渗透测试_metasploitable2怎么进入-程序员宅基地
文章浏览阅读1.1k次。一、系统弱密码登录1、在kali上执行命令行telnet 192.168.26.1292、Login和password都输入msfadmin3、登录成功,进入系统4、测试如下:二、MySQL弱密码登录:1、在kali上执行mysql –h 192.168.26.129 –u root2、登录成功,进入MySQL系统3、测试效果:三、PostgreSQL弱密码登录1、在Kali上执行psql -h 192.168.26.129 –U post..._metasploitable2怎么进入
Python学习之路:从入门到精通的指南_python人工智能开发从入门到精通pdf-程序员宅基地
文章浏览阅读257次。本文将为初学者提供Python学习的详细指南,从Python的历史、基础语法和数据类型到面向对象编程、模块和库的使用。通过本文,您将能够掌握Python编程的核心概念,为今后的编程学习和实践打下坚实基础。_python人工智能开发从入门到精通pdf