H5 学习足迹(一)_行程足迹h5-程序员宅基地
技术标签: 个人总结
文章目录
H5拖拽事件
<!DOCTYPE html>
<html>
	<head>
		<meta charset="utf-8">
		<title></title>
		<style type="text/css">
				.div2{
					width: 110px;
					height: 110px;
					background:lightblue
				}
				.div1{
					width: 110px;
					height: 110px;
					background:greenyellow;
					margin-top: 10px;
				}
		</style>
	</head>
	<body>
		<div class="div2">拖拽到此处,上传图片</div>
		<!-- H5拖拽属性draggable,使元素可拖拽的 -->
		<div class="div1" draggable="true"></div>


	</body>
	<script>
		const div1 = document.querySelector('.div1');
		const div2 = document.querySelector('.div2');

		// 鼠标拖拽事件
		// 鼠标点击拖拽的一瞬间
		div1.ondragstart = function(e){
			this.innerHTML = '2'
			// 处理拖拽事件火狐浏览器兼容性
			e.dataTransfer.setData('key','firefix')
		}
		// 鼠标拖拽元素移动事件
		div1.ondrag = function(){
			this.innerHTML += '1'
		}
		// 鼠标松开,拖拽结束事件
		div1.ondragend = function(){
			this.style.background = '#ff66cc'
		}

		// 拖拽到此处(用于H5拖拽图片到指定区域上传图片)  拖拽事件
		// 拖拽物进入到元素内的瞬间
		// div2.ondragenter = function(){}
		div2.addEventListener('dragenter',function(){
			this.style.background = 'red'
		})
		// 拖拽物在元素上时
		div2.addEventListener('dragover',function(e){
			this.innerHTML = '元素已拖入,尝试释放鼠标'
			// 此处阻止浏览器默认事件  防止图片拖到指定区域后被打开导致无法上传
			e.preventDefault();
			e.stopPropagation();
			return false;
		})
		// 拖拽物离开区域时
		div2.addEventListener('dragleave',function(){
			this.innerHTML = '拖拽到此处,上传图片'
		})
		// 拖拽物释放时,需要阻止默认事件并且阻止冒泡事件才可触发
		div2.addEventListener('drop',function(e){
			this.innerHTML = '成功拖入'

			// 此处阻止浏览器默认事件  防止图片拖到指定区域后被打开导致无法上传
			e.preventDefault();
			e.stopPropagation();
			return false;
		})


	</script>


</html>
火狐兼容
<!DOCTYPE html>
<html lang="en">
<head>
    <meta charset="UTF-8">
    <title>Title</title>

    <style>
        *{
            margin:0px;
            padding:0px;
        }

        body{
            background-color:gray;
        }

        #left{
            width:150px;
            height: 300px;
            background:purple;
            float:left;
        }

        #right{
            width:150px;
            height:300px;

            float:right;


        }

        li{
            line-height:35px;
            border:1px solid red;

        }


        img{
            position: absolute;
            left:-9999px;
        }


    </style>
</head>
<body>

<div id="left" draggable="true"></div>
<ul id="right" draggable="true">
    <li draggable="true">1</li>
    <li>2</li>
    <li>3</li>
    <li>4</li>
    <li>5</li>


</ul>
<img id="oImg"  src="img/logo.png" alt="">


<script>


    /*
    *   兼容问题
    *       dataTransfer对象
    *           setData():  设置数据 key和value(必须是字符串)
    *           getData():  获取数据,根据key值,获取对应的value
    *
    *   拖拽元素的图标
    *       setDragImage: 三个参数(1.指定的图片id属性名, 2.拖拽时坐标X, 3.拖拽时坐标Y)
    *
    *
    * */


    // 从right中获取标签li(仅id属性可以这样写)
    let oLi = right.querySelectorAll('li');

    // 让每个li标签都可被拖拽
    oLi.forEach((item,index)=>{
        //设置属性
        item.setAttribute('draggable','true');

        //监听开始拖拽时的事件
        item.ondragstart = function(e){

            // dataTransfer 谷歌火狐都兼容的对象
            console.log(1,e.dataTransfer);
            // 让谷歌火狐都兼容,都可拖拽
            e.dataTransfer.setData('key',index);

            // setDragImage 三个参数: 1.指定的元素 2.坐标X 3.坐标Y
            // 让li在被拖拽时候显示指定元素的图片
            e.dataTransfer.setDragImage(oImg,20,20)


        }
    });

    left.ondragenter = function(){
        this.innerHTML = '请释放你的双手';
    };
    left.ondragover = function(e){

        // 此两行代码目的是让ondrog生效
        e.preventDefault();
        e.stopPropagation();
    };
    left.ondragleave = function(){
        this.innerHTML = '';
    };
    left.ondrop = function(e){
        this.innerHTML = '拖拽到此删除文件';
        right.removeChild(oLi[e.dataTransfer.getData('key')]);
    };


</script>

</body>
</html>
拖拽事件设置获取数据拖入删除案例
<!DOCTYPE html>
<html>
	<head>
		<meta charset="utf-8">
		<title></title>
		<style>
			.div2{
				width: 110px;
				height: 110px;
				background:lightblue
			}
			.div1{
				width: 110px;
				height: 110px;
				background:greenyellow;
				margin-top: 10px;
			}
		</style>
	</head>
	<body>
		<div class="div2">拖入删除</div>
		<div class="div1" draggable="true"></div>
		<div class="div1" draggable="true"></div>
		<div class="div1" draggable="true"></div>
		<div class="div1" draggable="true" draggable="true"></div>
		<div class="div1" draggable="true"></div>
		<div class="div1" draggable="true"></div>
		<div class="div1" draggable="true"></div>

	</body>
	<script>
		const div1 = document.querySelectorAll('.div1');
		const div2 = document.querySelector('.div2');

		// 循环遍历设置拖拽事件
		div1.forEach(function(value,index){
			value.ondragstart = function(e){
				console.log(e.dataTransfer)
				// 兼容火狐
				// 用处:正在拖拽的元素设置数据,目标元素可以获取
				e.dataTransfer.setData('key',index);
				this.innerHTML = e.dataTransfer.getData('key')
			}
		})

		div2.addEventListener('dragenter',function(){

		})
		div2.addEventListener('dragover',function(e){
			this.style.background = 'red'
			e.preventDefault();
			e.stopPropagation();
			return false;
		})
		div2.addEventListener('dragleave',function(){
			this.style.background = 'lightblue'
		})

		// div2区域,div1拖入div2则获取数据删除对应拖拽的元素
		div2.addEventListener('drop',function(e){
			console.log(e.dataTransfer.getData('key'))
			document.body.removeChild(div1[e.dataTransfer.getData("key")]);
			this.innerHTML = '删除成功'
			e.preventDefault();
			e.stopPropagation();
			return false;
		})


	</script>


</html>
file 获取图片信息
<!DOCTYPE html>
<html>
	<head>
		<meta charset="utf-8">
		<title></title>
	</head>
	<style>

		div{
			width: 200px;
			height: 200px;
			background:#000;
		}


	</style>
	<body>


		<div class=""></div>

	</body>

	<script>

			// FileReader 将图片信息转换成base64 得到的是图片的本体
		// 拖入图片预览
		const div = document.querySelector('div');
		div.ondragover = function(e){

			e.preventDefault();
			e.stopPropagation();
			return false;
		}

		div.ondrop = function(e){
			// 1.file对象
			console.log(e.dataTransfer.files)
			for(var file of e.dataTransfer.files){
				console.log(file)
				// (1)创建文件读取对象
				const f = new FileReader()
				// (2)读取图片url
				f.readAsDataURL(file)
				// (3)加载图片信息
				f.onload = function(){
					const img = new Image()
					img.src = this.result;
					document.body.appendChild(img)

					// 图片信息传递到后台
					// this.result.ajax
				}
			}

			// item()方法用于获取批量拖入图片的指定图片
			// const file = e.dataTransfer.files.item(0);

			e.preventDefault();
			e.stopPropagation();
			return false;
		}

	</script>

</html>
blob获取图片信息
<strong><!DOCTYPE html>
<html>
	<head>
		<meta charset="utf-8">
		<title></title>
	</head>
	<style>

		div{
			width: 200px;
			height: 200px;
			background:#000;
		}


	</style>
	<body>


		<div class=""></div>

	</body>

	<script>

		// blob 文件本身在内存当中 createObjectURL  得到的只是一个链接
		// 拖入图片预览
		const div = document.querySelector('div');
		div.ondragover = function(e){

			e.preventDefault();
			e.stopPropagation();
			return false;
		}

		div.ondrop = function(e){
			// blob 把拖拽进来的图片转换成二进制
			// blob 多用于视频拖入展示

			// const file = e.dataTransfer.files.item(0);
			for(var file of e.dataTransfer.files){
				// 参数1.数组 2.文件类型
				const blob = new Blob([file],{type:'image/jpg'});
				// 创建文件链接
				const url = window.URL.createObjectURL(blob);
				console.log(url)
				const img = new Image();
				img.src = url;
				img.onload = function(){
					document.body.appendChild(img)
				}
			}


			e.preventDefault();
			e.stopPropagation();
			return false;
		}


	</script>

</html>
</strong>
blob 的其他类型用法
<!DOCTYPE html>
<html>
	<head>
		<meta charset="utf-8">
		<title></title>
	</head>
	<body>

		<button id="btn">点击下载</button>
		<a href="" class="a"></a>

	</body>
	<script>
		// word文档下载
		//http://www.w3school.com.cn/media/media_mimeref.asp  w3c MIME参考手册
		var btn = document.querySelector('#btn')
		var a = document.querySelector('.a')
		btn.onclick = function(e){
			// blob 1.word文档内容  2.类型
			// 可以用来隐藏真实的下载地址, 可以防止别人爬虫
			const blob = new Blob(['word文档内容'],{type:'application/msword'})
			const url = window.URL.createObjectURL(blob)
			console.log(url)
			a.href = url
			a.click()

		}


	</script>

</html>
fetch基本用法
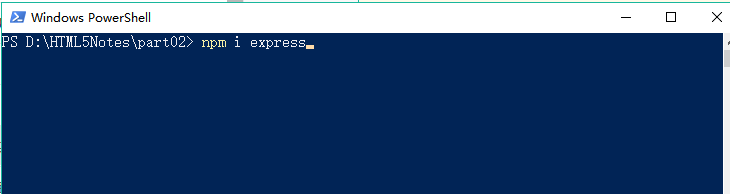
fetch 是同es6发布的封装ajax方法
- 在当前文件夹下安装express 搭建接口文件
2.fetch.html app.js
<!DOCTYPE html>
<html>
	<head>
		<meta charset="utf-8">
		<title></title>
	</head>
	<body>
		fetch基本用法

	</body>
	<script>
		// fetch基本用法(同es6发布的ajax封装函数)
		// 参数: 1.url 2.额外选项
		// fetch('http://baidu.com',{})

		//get 使用方式 传参在url?query
		// fetch('http://localhost:233/?a=1&b=2')
		// 	.then(res => res.json())
		// 	.then(res => {
		// 		console.log(res)
		// 	})


		// post 使用方式
		fetch('http://localhost:233/',{
			method:'post'
		}).then(res => res.json())
			.then(res => {
				console.log(res)
			})

	</script>

</html>
app.js
const express = require('express');
// 初始化express
const app = express()

// 用来在端口后直接加上服务器作用域下的文件名来访问文件
app.use(express.static(__dirname))

// 当以get方式进行访问的时候
app.get('/',function(req,res){
	console.log(req.query)
	res.send({
		Hello:'Hello World'
	})
})


// 当以post方式访问的时候做些什么操作
app.post('/',function(req,res){
	console.log(req.query)
	res.send({
		Hello:'Hello World'
	})
})


// 监听端口
app.listen(233);
3.运行后台服务器 node + 接口文件名


fetch 的get方式传参后台输出前台传到后台的参数
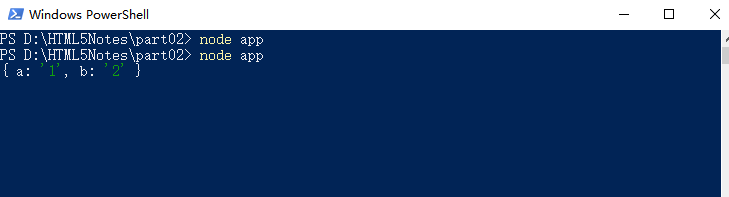
每次修改完文件内容需要重启服务器 node app
解决跨域
浏览器localhost:8048端口号请求后台localhost:233存在跨域问题的解决办法
- 跨域.html
<!DOCTYPE html>
<html>
	<head>
		<meta charset="utf-8">
		<title></title>
	</head>
	<body>

		<script>
			// 跨域的三个解决办法

			网址的组成: http:// 域名 : 端口号
			http://www.baidu.com:80
			https:www.baidu.com:443

			域名  或者 端口号不同就是跨域

		// 	3种解决办法  只能在后台
				1. 在后台添加头信息
				2. ajax请求自己的后台,由自己的后台再去请求别人的后台(后台发送ajax请求不会存在跨域问题)
				3.jsonp 本质上就是个script标签,script标签引入的东西不会存在跨域问题


			// jsonp 的用法
				1. 定义一个函数
				2. 把函数的名字通过script标签传递给后台
				3. 后台接收到函数名之后进行拼接执行
				function goudan(data){
					console.log(data)
				}


		</script>

		<script src="http://localhost:233/jsonp?cb=goudan"></script>


	</body>


</html>
- app.js
const express = require('express');
// 初始化express
const app = express()

// 用来在端口后直接加上服务器作用域下的文件名来访问文件
app.use(express.static(__dirname))

//解决跨域
app.use(function(req,res,next){
	res.header('Access-Control-Allow-Origin','*')
	res.header('Access-Control-Allow-Credentials','true')
	res.header('Access-Control-Allow-Methods','POST')
	next()
})


// 当以get方式进行访问的时候
app.get('/',function(req,res){
	console.log(req.query)
	res.send({
		Hello:'Hello World'
	})
})


// 当以post方式访问的时候做些什么操作
app.post('/',function(req,res){
	console.log(req.query)
	res.send({
		Hello:'Hello World'
	})
})


// jsonp解决跨域
app.get('/jsonp',function(req,res){
	// 后台输出前台传递过来的函数名
	console.log(req.query.cb);
	const str = ' ${req.query.cb} ( ${JSON.stringify({xiaoming:"考了100分"})} )';
	// 发送到前台
	res.send(str)
})

// 监听端口
app.listen(233);
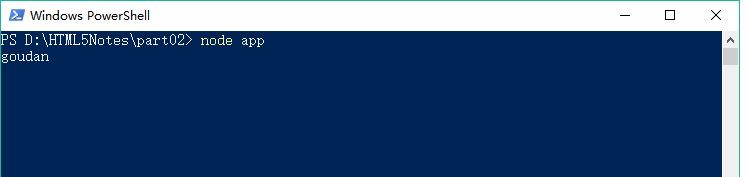
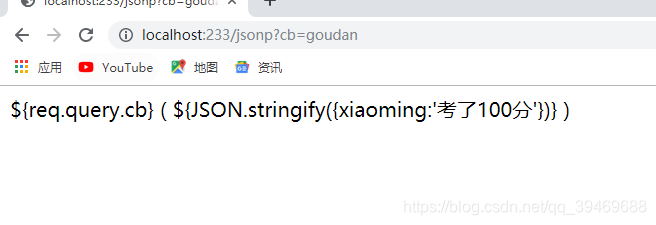
- 跨域解决后控制台输出
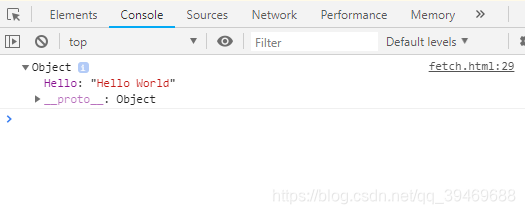
关于jsonp解决跨域,代码如上
jsonp解决跨域时 刷新页面script标签就会将方法名传递给后台
以下笔记统一后台文件
node 后台文件
app.js
const express = require('express');
// 初始化express
const app = express()
// 多文件拖拽上传 npm i multer
const multer = require('multer');
// 设置文件存储路径
storage = multer.diskStorage({
// __dirname : 当前文件所在的路径
destination: __dirname,
filename:function(req,file,cb){
// 获取文件的名字
// file.originalname === hello.jpg
let filename = file.originalname.split('.');
// 设置文件名,${Date.now()}是文件名 ${filename[filename.length-1]}是后缀名
cb(null,`${Date.now()}.${filename[filename.length-1]}`)
}
})
upload = multer({
storage
})
// 接收前台上传图片请求
app.post('/upload',upload.single('file'))
// blob 下载文件
const fs = require('fs');
app.get('http://localhost:233/blob',function(req,res){
// 读取当前目录下的某个文件 binary 以二进制的形式读取
fs.readFile('./1561554358748.JPG','binary',function(err,filedata){
// 文件以二进制的形式写入发送到前端
res.write(filedata,'binary');
res.end()
})
})
// 用来在端口后直接加上服务器作用域下的文件名来访问文件
app.use(express.static(__dirname))
// 设置接收post传过来的参数 (fetch额外选项)
app.use(express.json());
app.use(express.urlencoded({extended:true}))
//解决跨域
app.use(function(req,res,next){
res.header('Access-Control-Allow-Origin','*')
res.header('Access-Control-Allow-Credentials','true')
res.header('Access-Control-Allow-Methods','GET,POST')
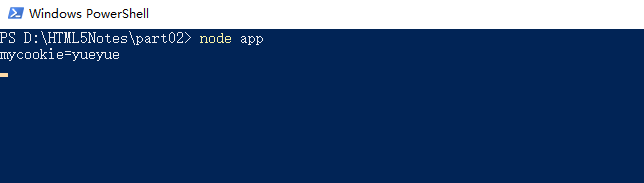
// 设置 cookie 可放入浏览器 (fetch 额外选项)
res.header('Set-cookie','mycookie=yueyue');
next()
})
// 当以get方式进行访问的时候 (fetch额外选项)
app.get('/',function(req,res){
console.log(req.headers.cookie)
res.send({
Hello:'Hello World'
})
})
// 当以post方式访问的时候做些什么操作 (fetch额外选项)
app.post('/',function(req,res){
console.log(req.body)
res.send({
Hello:'Hello World'
})
})
// jsonp解决跨域
app.get('/jsonp',function(req,res){
// 后台输出前台传递过来的函数名
console.log(req.query.cb);
const str = ' ${req.query.cb} ( ${JSON.stringify({xiaoming:"考了100分"})} )';
// 发送到前台
res.send(str)
})
// 监听端口
app.listen(233);
fetch额外选项
<!DOCTYPE html>
<html>
	<head>
		<meta charset="utf-8">
		<title></title>
	</head>
	<body>

		<!-- <form action="/" method="post">
			<input type="text" name="yueyue">
			<input type="submit" value="点击提交">
		</form> -->


	</body>
	<script>
		// fetch 额外选项,参数,头信息

		// 实例化Formdata,模拟一个表单添加信息后作为参数传递给后台
		const form = new FormData();
		form.append('yueyue','nvshen');
		form.append('mingming','nvyou')
		fetch('http://localhost:233/',{
			method:'post',
			body: form,
			headers:{
				//设置类型使后台能够接收到参数
				'Content-type':'application/x-www-form-urlencoded'
			}
		}).then(res => res.json())
		.then(data => {
			console.log(data);
		})


		// fetch 在跨域的时候默认是不发送cookie的,发送cookie到后台用于验证用户登陆状态
		fetch('http://localhost:233/',{
			// 设置参数让前台发送 cookie (后台设置的cookie 如果前台不设置credentials则后台无法接收到cookie)
			credentials: 'include'
		})


	</script>
</html>

多文件拖拽上传
<!DOCTYPE html>
<html>
	<head>
		<meta charset="utf-8">
		<title></title>
	</head>
	<style>
		#div{
			width: 200px;
			height: 200px;
			background:#963;
		}
	</style>
	<body>

		<div id="div">

		</div>

	</body>
	<script type="text/javascript">

		// 多文件拖拽上传
		const div = document.querySelector('#div')
		div.ondragover = function(e){
			e.preventDefault();
			e.stopPropagation();
			return false;
		}

		div.ondrop = function(e){

			for(var file of e.dataTransfer.files){
				console.log(file)
				const form = new FormData();
				form.append('file',file)
				fetch('http://localhost:233/upload',{
					method:'post',
					body: form
				})
			}

			e.preventDefault();
			e.stopPropagation();
			return false;
		}

	</script>


</html>
需要下载multer包
npm i multer
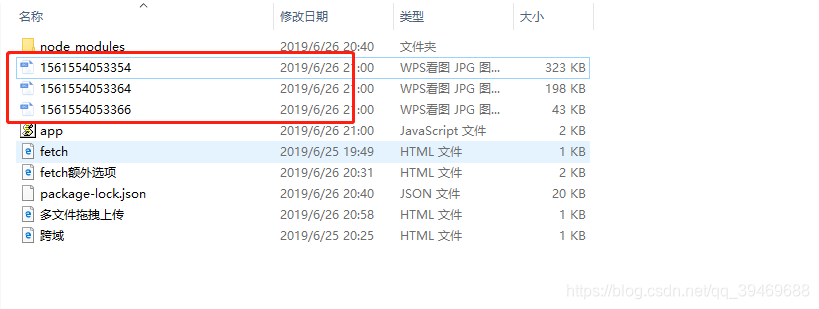
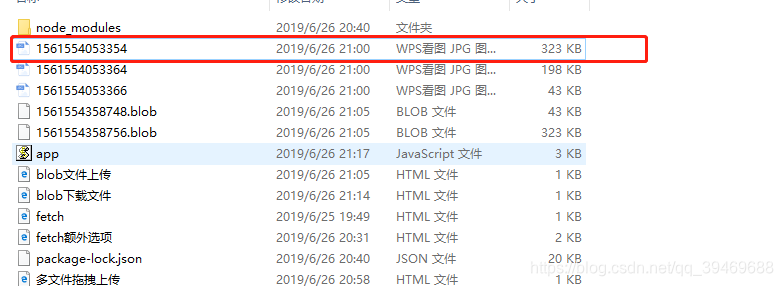
1.node 后台接口文件名
2.拖拽图片到指定区域并发送请求到后台
3.文件已经上传到后台如图所示
blob 文件上传
<!DOCTYPE html>
<html>
	<head>
		<meta charset="utf-8">
		<title></title>
	</head>
	<style>
		#div{
			width: 200px;
			height: 200px;
			background:#963;
		}
	</style>
	<body>

		<div id="div">

		</div>

	</body>
	<script type="text/javascript">

		// blob文件拖拽上传
		const div = document.querySelector('#div')
		div.ondragover = function(e){
			e.preventDefault();
			e.stopPropagation();
			return false;
		}

		div.ondrop = function(e){

			for(var file of e.dataTransfer.files){
				const form = new FormData();
				const blob = new Blob([file],{type:'image/gif'})
				// 将blob实例对象添加到表单实例中
				form.append('file',blob)
				fetch('http://localhost:233/upload',{
					method:'post',
					body: form
				})
			}

			e.preventDefault();
			e.stopPropagation();
			return false;
		}

	</script>


</html>
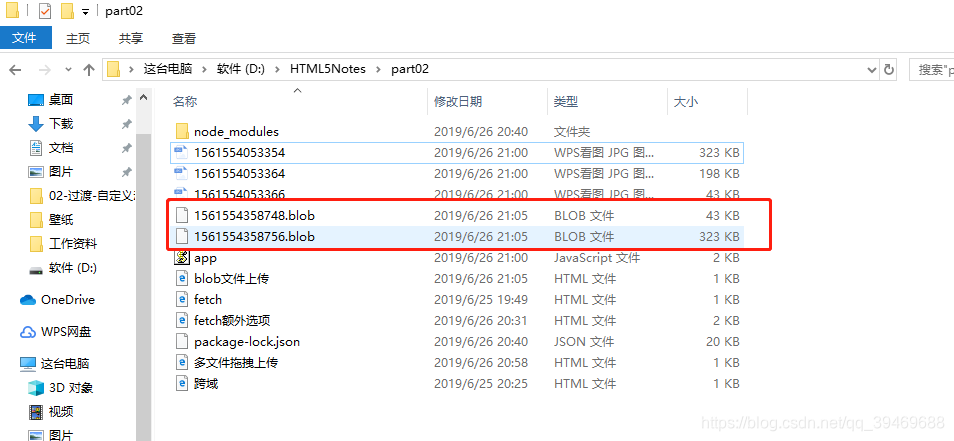
blob文件上传
1.将拖入的文件存放于blob实例中
2.将blob实例添加到form实例中
3.将form作为参数发送请求到后台
上传文件后台接收为blob后缀文件,如图所示
blob下载文件
<!DOCTYPE html>
<html>
	<head>
		<meta charset="utf-8">
		<title></title>
	</head>
	<body>
		<button id="btn">点击下载</button>
		<a href=""></a>

	</body>
	<script>

		// blob下载文件
			// res.blob(): 后台以二进制的形式写入发送给前端,前端则转换类型以二进制的形式接收
		const btn = document.querySelector('#btn');
		const a = document.querySelector('a')
		btn.onclick = function(){
			fetch('http://localhost:233/blob')
			.then(res => res.blob())
			.then(data => {
				// 创建链接
				const url = window.URL.createObjectURL(data)
				console.log(url)
				a.href = url;
				// 设置下载时的文件名
				a.download = 'firstpic.jpg'
				// JS控制a标签的点击无需download属性即可下载
				a.click();
			})
		}

	</script>
</html>
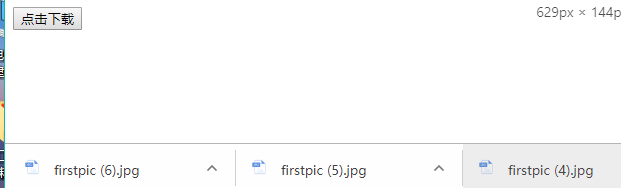
blob 下载文件
1.后台读取指定路径下的指定文件,启动服务器 node 接口文件名,如图所示
2.前台发送请求获取图片url
3. 下载如图所示
智能推荐
论文阅读:(ECCV 2022)Simple Baseline for Image Restoration_simple baselines for image restoration-程序员宅基地
文章浏览阅读2.2k次,点赞5次,收藏17次。ECCV 2022)Simple Baseline for Image Restoration_simple baselines for image restoration
Visio2013软件文档流程图中如何绘制圆角左箭头附亲测可用工具及UML序列图使用?_visio圆角左箭头在哪里-程序员宅基地
文章浏览阅读3.5k次。最近需要写些文档,于是乎又捡起了Visio2013,不过,打开的时候,已经授权码过期了,网上搜了一个,有需要的可自行下载:VisioProfessional_x86_zh-cn.zip:KMSpico_setup_visio2013pojie工具.zip:如果以前你安装过一个,那个KMSpico可以不卸载,也可以卸载,最好是卸载,中间提示错误的话,就忽略就行,我就是这么干的。反正一切运行正常,Visio2013又可以开始使用了。至于什么杀毒软件报错啥的,自己关闭杀软或者添加为白名单即可。看下图中,我_visio圆角左箭头在哪里
基于C++、MySQL的图书销售管理系统_c++ mysql管理系统实验报告设计思路-程序员宅基地
文章浏览阅读1.5w次,点赞7次,收藏174次。数据库课程设计报告开发环境与开发工具开发语言:C++、MySQL操作系统:macOS Mojave Version 10.14.5开发工具:Xcode IDE、iTerm 命令行终端终端环境:iTerm + zsh、Xcode 终端调试台MySQL Server 版本:5.7.25 MySQL Community Server (GPL)运行方式:cd 到目录下 make 可完成编译连接,而后直接 ./bsms 即可运行系统需求分析 当今的图书销售行业有数据量大、数据结构复杂、数据变_c++ mysql管理系统实验报告设计思路
ubuntu16.0.4bug无法解析域名_暂时不能解析域名“ppa.launchpad.net”-程序员宅基地
文章浏览阅读2.8w次,点赞4次,收藏43次。root@ubuntu:/etc/apt# apt-get update错误:1 http://mirrors.aliyun.com/ubuntu xenial InRelease 暂时不能解析域名“mirrors.aliyun.com”错误:2 http://mirrors.aliyun.com/ubuntu xenial-updates InRelease 暂时不能解析域名“mir..._暂时不能解析域名“ppa.launchpad.net”
qml Canva 中的fill不起作用_canvas fill填充无效-程序员宅基地
文章浏览阅读269次。解决qml中的fill填充颜色不起作用_canvas fill填充无效
前端中高级基础知识面试汇总_前端基础知识面试-程序员宅基地
文章浏览阅读9.8k次,点赞53次,收藏321次。保持学习,保持热爱。持续更新ing~前端基础github地址。README.md可以下载到typora中打开,会有整个大纲目录显示(github中markdown目录快捷生成方式不现实,之后可能会想办法生成贴过来,暂时不做相关处理)前端基础gitbook地址。README.md中会实时更新进度内容。gitbook中考虑整个学完整理完成之后,再去统一处理发布,敬请期待!gitbook版本可建议后期碎片化时间进行复习使用。前端基础csdn地址。程序员宅基地专栏前端自我修养进阶中,也会一篇一篇实时更新相关_前端基础知识面试
随便推点
Windows客户端访问vsftpd服务器中文乱码问题解决_vsftpd 支持gbk-程序员宅基地
文章浏览阅读1.9w次。原因:vsftpd没有处理字符编码的转换,Windows使用的是GBK编码,而linux一般使用UTF-8编码。解决办法:1、使用vsftpd的补丁,目前只有vsftpd-2.0.3-encoding.patch.tar.bz22、使用能够设置编码的FTP客户端如FlashFXP 4.2.1,选择【站点】-【站点管理器】-【站点列表】-【快速连接】,选择使用的连接,点击【选项】-【_vsftpd 支持gbk
Leetcode 383. Ransom Note-程序员宅基地
文章浏览阅读187次。【代码】Leetcode 383. Ransom Note。
第4讲、电阻、电容、电感、二极管等器件的原理图Symbol绘制_orcad电感怎么画-程序员宅基地
文章浏览阅读5.7k次,点赞3次,收藏15次。本讲的主要内容是如何使用OrCAD绘制电阻、电容、电感、二极管等分立器件的原理图Symbol。在上一讲中我们完成了DragonFly四轴飞行器原理图工程的创建以及原理图库的创建,但是软件附带的库中的器件太少,很多我们需要的找不到,而且很多能找到的也不太符合我们的要求,所以我们需要自己画这个项目中的原理图Symbol。我今天带着大家学习一下如何使用OrCAD绘制电阻、电容、电感、二极管等器件的原..._orcad电感怎么画
Ext4.2 使用iframe实现页面四宫格布局_html 四宫格 iframe-程序员宅基地
文章浏览阅读656次。var xxxPanel = new Ext.Panel({ renderTo: Ext.getBody(), layout: 'anchor', width : '100%', height : heightbody+40, items: [ { ..._html 四宫格 iframe
windows 查看本地安装证书情况_查看电脑安装的证书-程序员宅基地
文章浏览阅读855次。windows 查看本地安装证书情况_查看电脑安装的证书
征信报告 加密文档_教你如何把文件(包括照片视频)隐藏并加密-程序员宅基地
文章浏览阅读2.4k次。大家电脑或者U盘里都会有一些比较重要和私密的文件,不方便给他人看到。比如账号密码、个人信息、工作资料、照片视频等,这些数据泄漏出去会很麻烦……虽然现在大多都有开机密码,但也有借用电脑和U盘给别人的情况等。因此将重要文件妥善保管也是一个很重要的技能。本文就分享下「如何正确地隐藏文件,和给文件夹加密的小工具」,保护个人数据安全。经小工具加密后文件夹中的文件会消失的无影无踪,输入密码后它会立刻..._怎么隐藏征信上的职业信息